CNC Basics
SolidWorks/HSMWorks: How to Setup Adpative Clearing on Edge Features
09
Apr
Apr
Case: We have some edge features and need to profile just them. In this example, we are using the slots on our High Z Plate. Note that normally we would use a contour feature for slots like these and this is just to illustrate the setup.
Steps to setup adaptive clearing:
- Setup your job in HSMXpress for the operation
- Select Adaptive Clearing from the milling operations.
- In the model Section, select the top face of the model (see pic below)
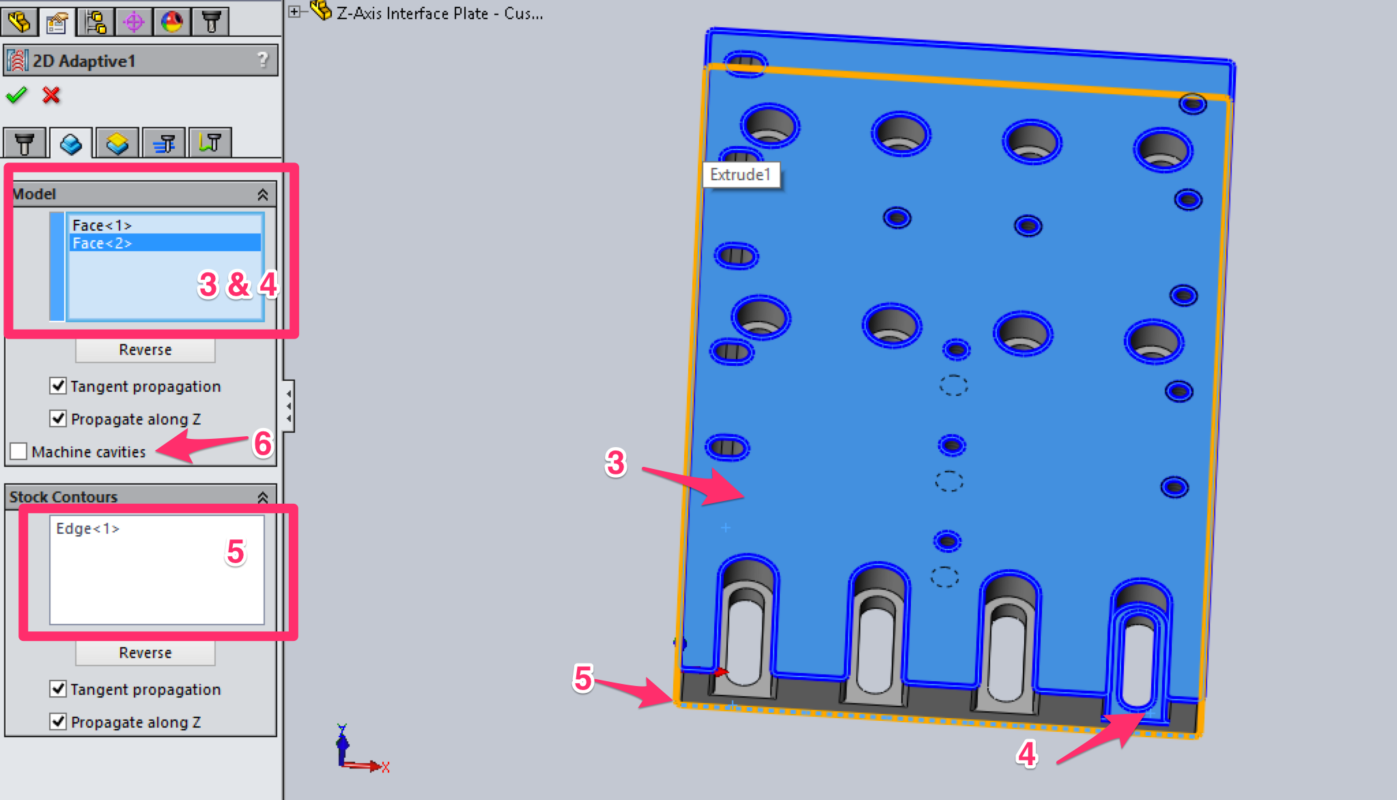
- Optional: If you have edge features that you DO NOT want to generate tool paths for, select the face as an edge under Models. (see pic below). For this example, we are using one of the slots to illustrate the point.

- Under the Stock Contours Section, select one of the bottom edges of the part.
- Under the heights section, set the Top height as “From Selection” and then select the top face of the model. Note: this assumes this is the top of the model. You may need to change this in some cases.
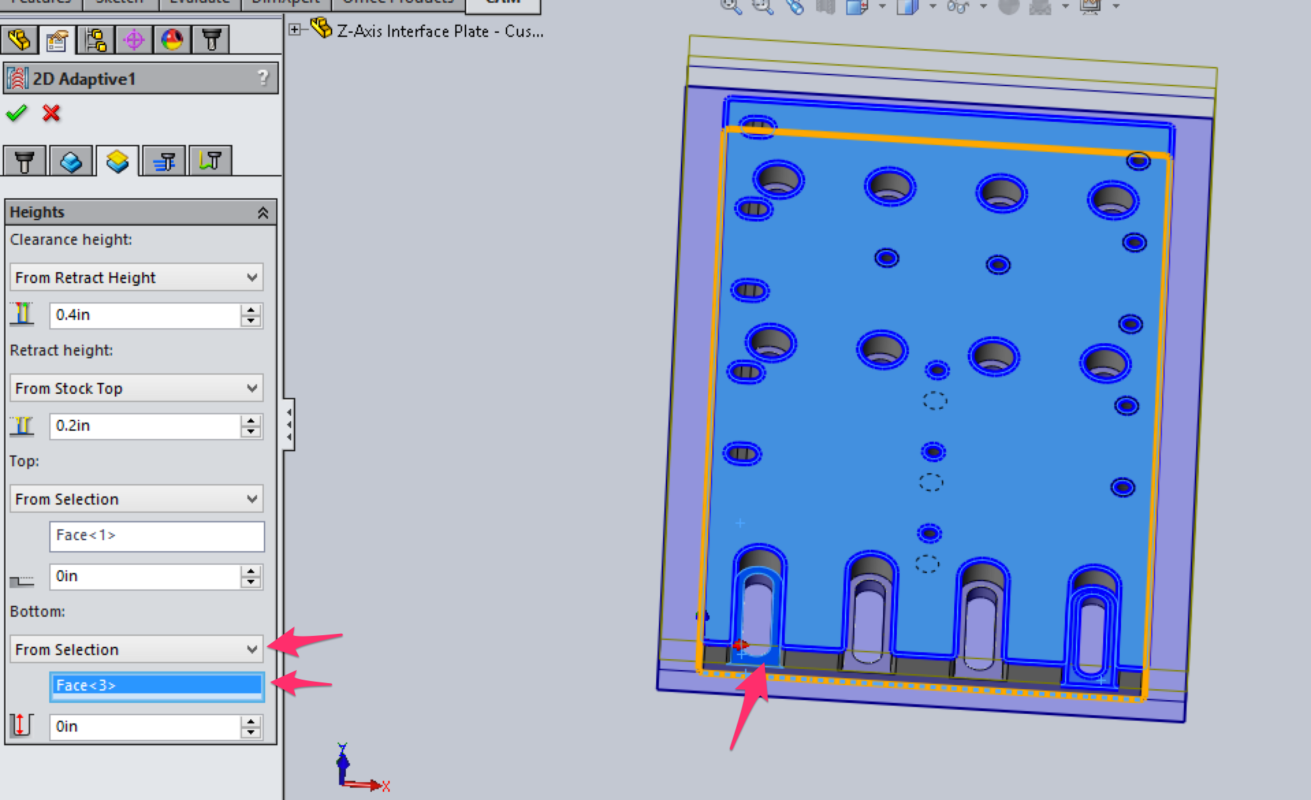
- Under the Heights Section, set the Bottom height as “From Selection” and then select the bottom face of the features that you are clearing. Note that you cannot set multiple depths, so if you have features are different depths to contour, you will need to setup different jobs.
- Setup any other parameters you need to for the job. These should be set on a per job basis.
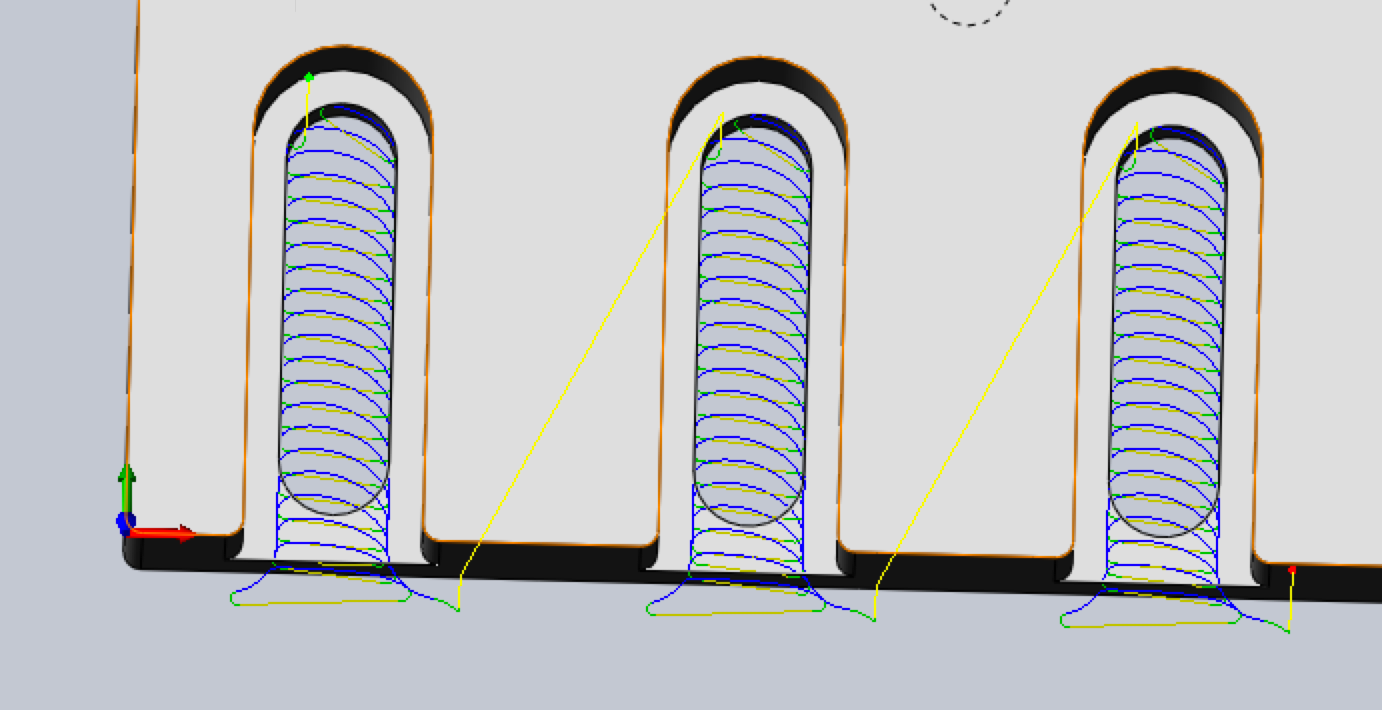
- Click Ok. Your job should come out like below: